
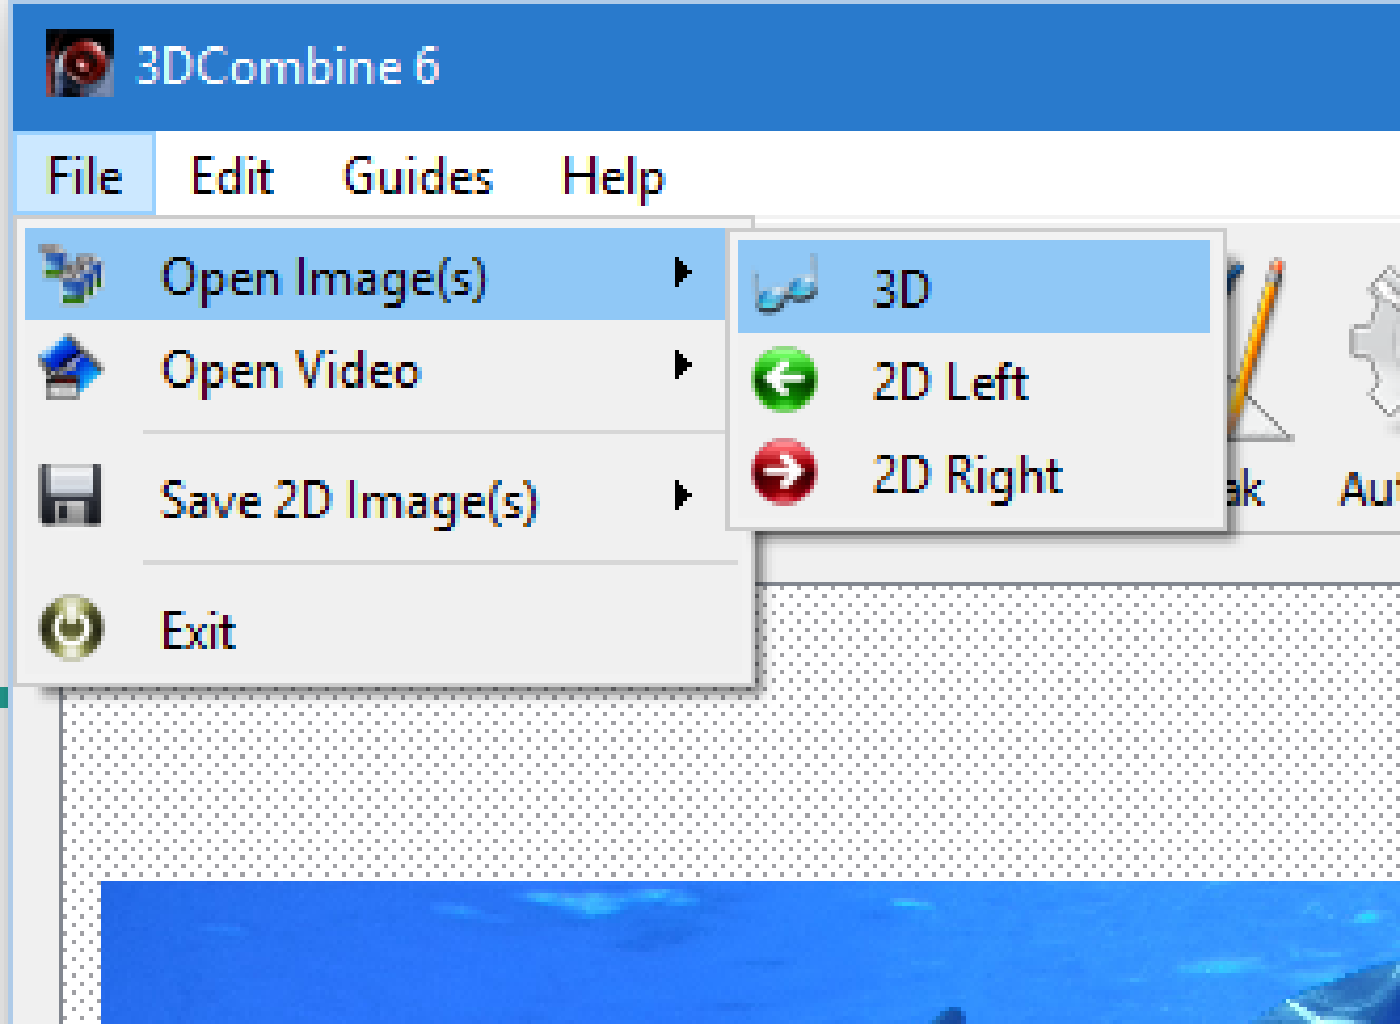
To open image files in 3DCombine, simply select File>Open Images.
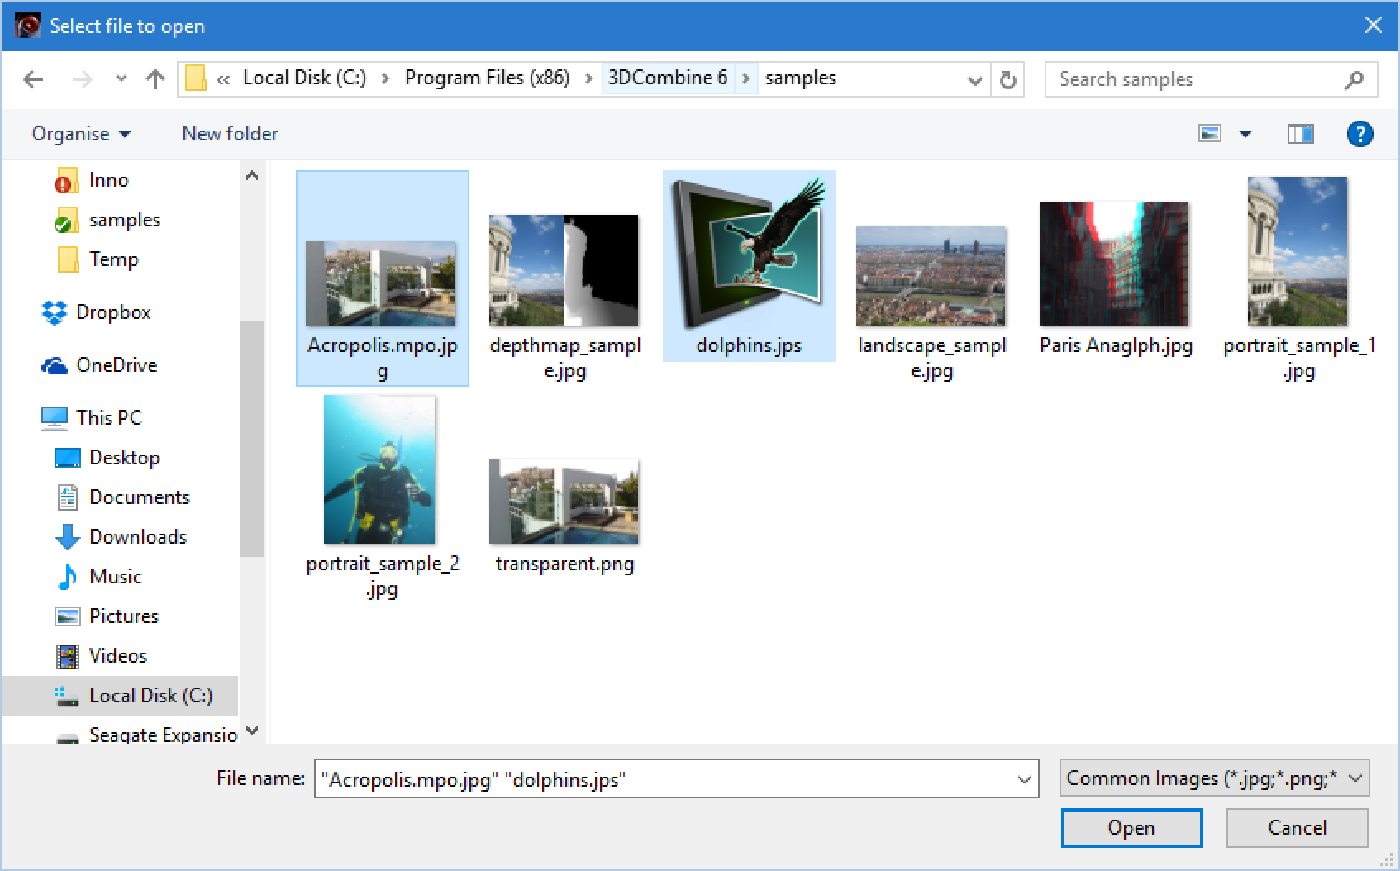
The File Open dialog should appear. Select one or more files to open them for viewing/editing. To enter batch mode, multiple files must be selected. This can be done by drag selecting, holding the control key and selecting multiple files, or holding the shift key and selecting a block of files. This behaviour may vary slightly by plaform.
For this guide, two of the sample images provided with the program have been selected.
Click 'Open'.
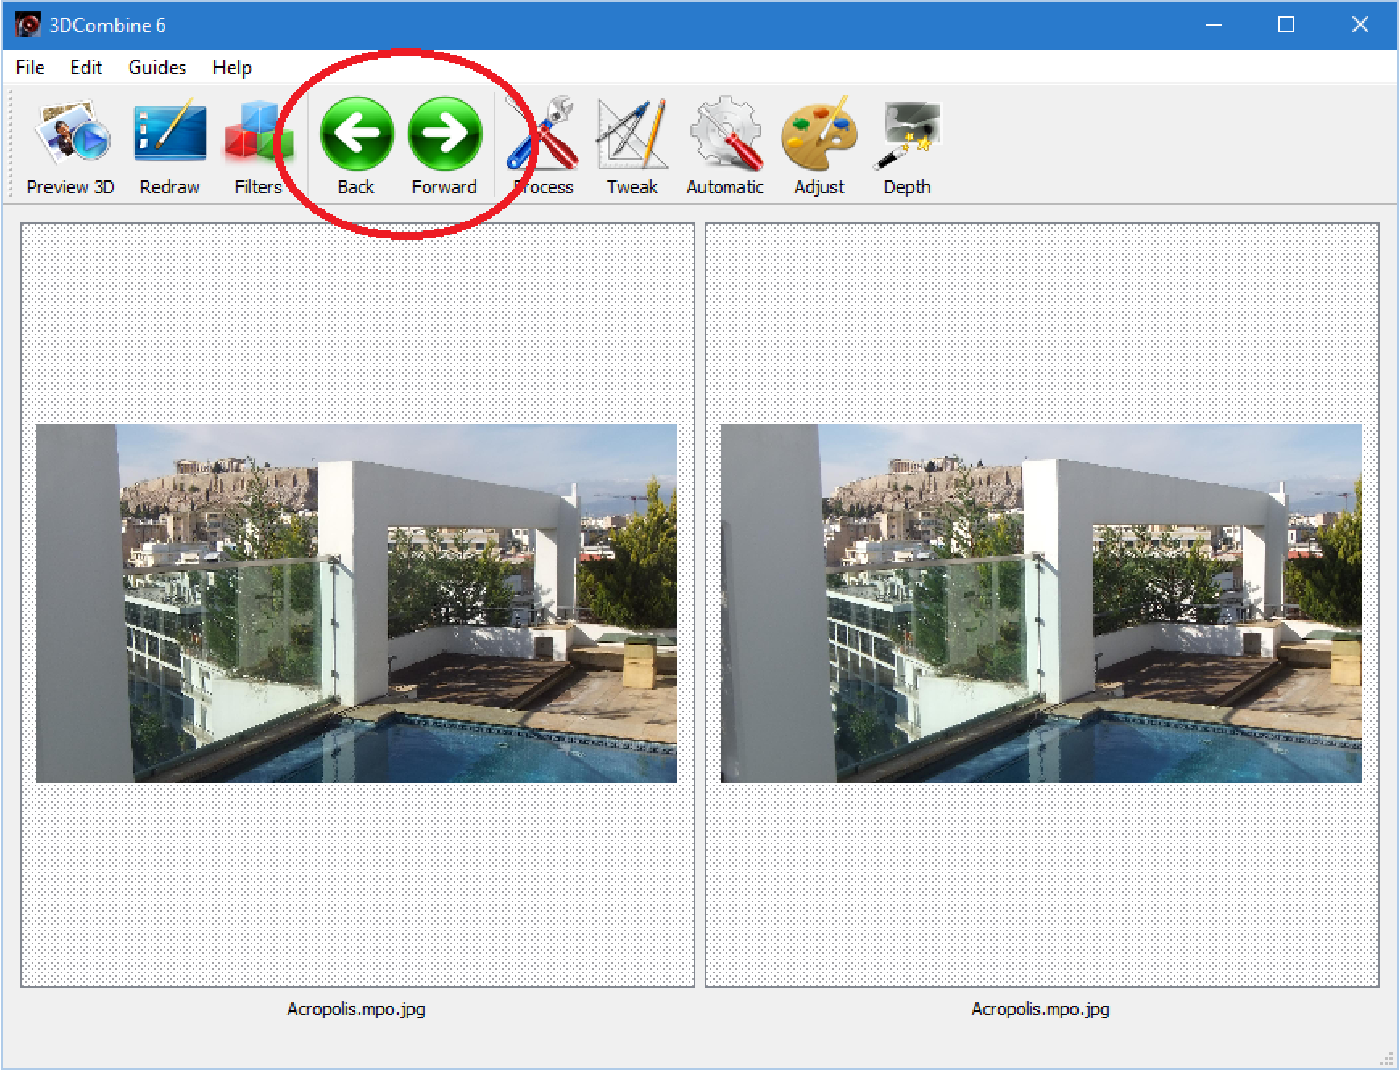
Once multiple files are opened, the program will enter batch mode. Two new green icons will appear in the toolbar. These allow you to scroll through the images that are being edited. The active image will be displayed in the main window of the program, with the left eye in the left window and the right eye in the right window.
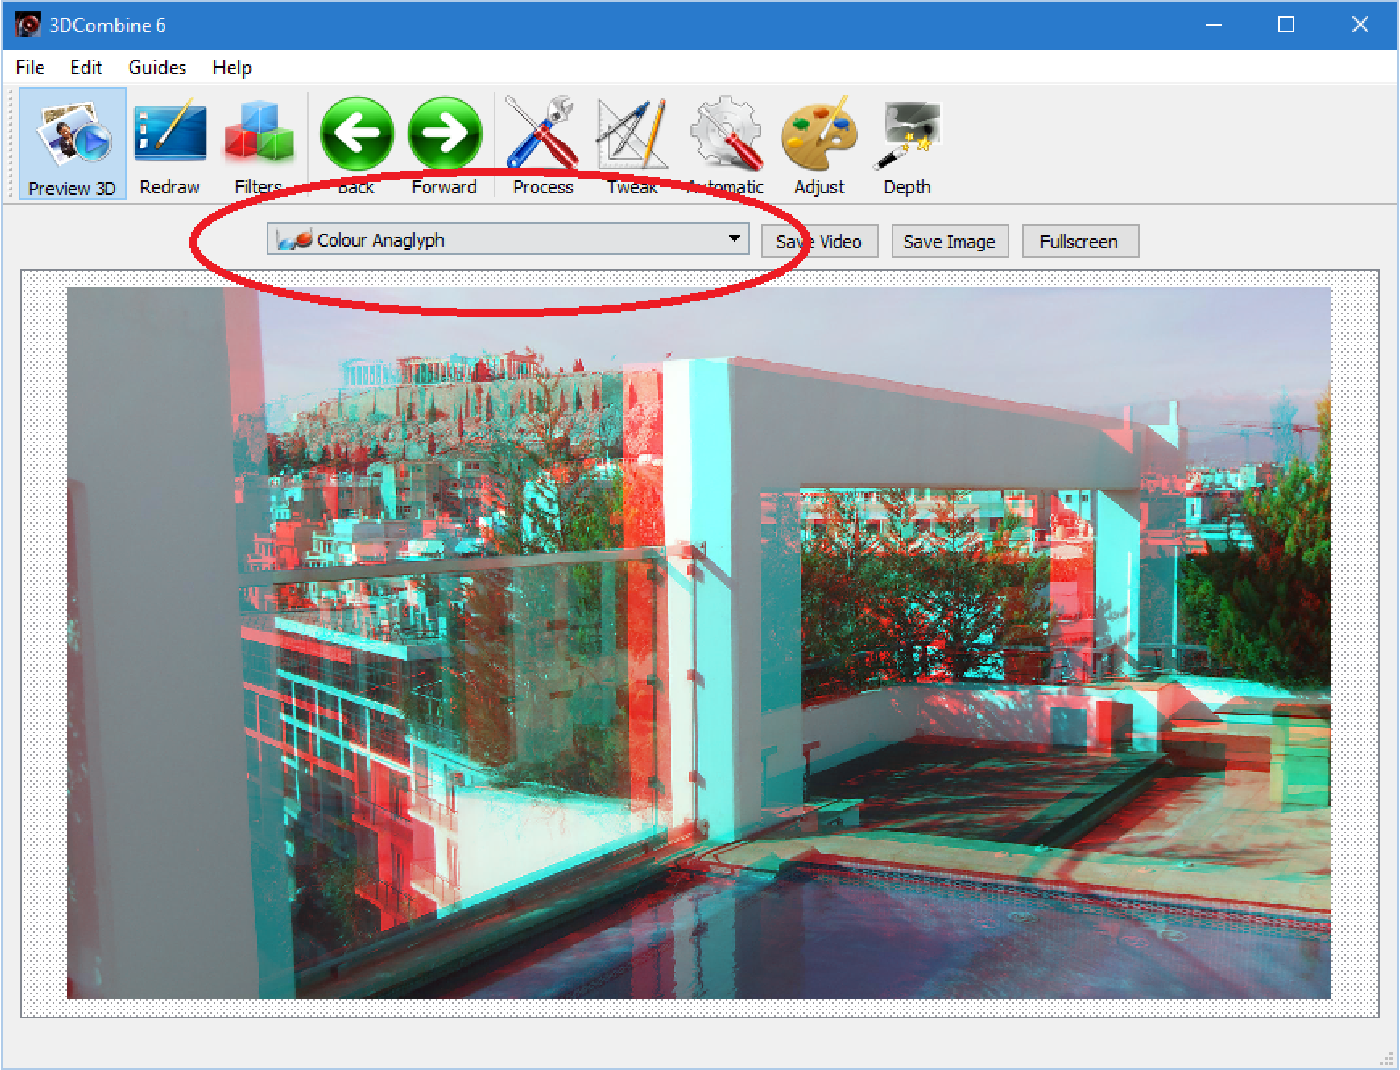
Clicking on the 'Preview 3D' button at the top left switches the display from separate left and right images to a 3D image. The 3D image mode can be changed by clicking on the drop down highlighted on the left. In this case it has been changed to display the images as a colour anaglyph 3D image.
To return to viewing the separate left and right images, simply click 'Preview 3D' again.
The 3D image, in the selected format, can also be displayed Fullscreen by clicking the 'Fullscreen' button. In this mode, the left and right arrow keys or the mouse wheel can be used instead of the green buttons to change the displayed image.
The 3D image or images can be saved in the currently selected format by selecting the 'Save Image' button.
If only one image is loaded then the user will be prompted for the filename of the saved image.
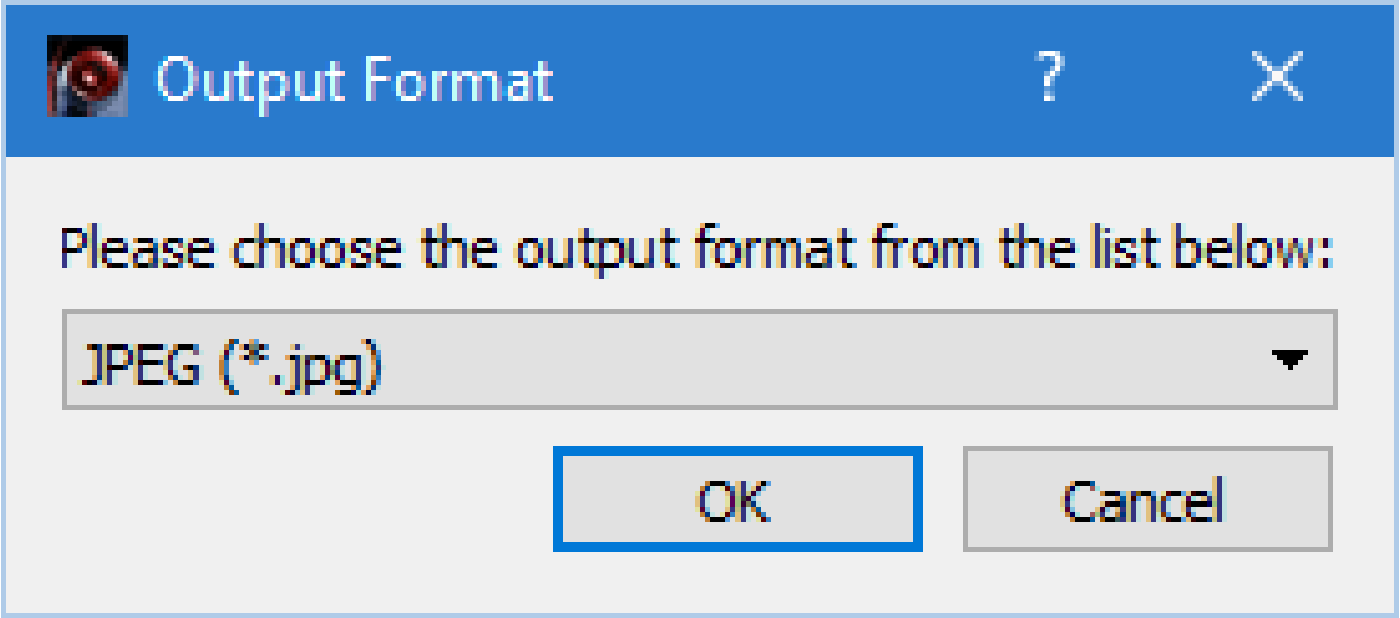
If multiple images are loaded the user will be prompted for a folder. This folder will be used to save the 3D images using their original filenames. A second window will then appear to allow the output format of the images to be chosen. This will change the extension of the image, but not the main filename. To change the output format, simply click on the dropdown.
It is recommended not to save over the original images, either by selecting a new filename, or a different output folder. If the original image is overwritten then it cannot be recovered.
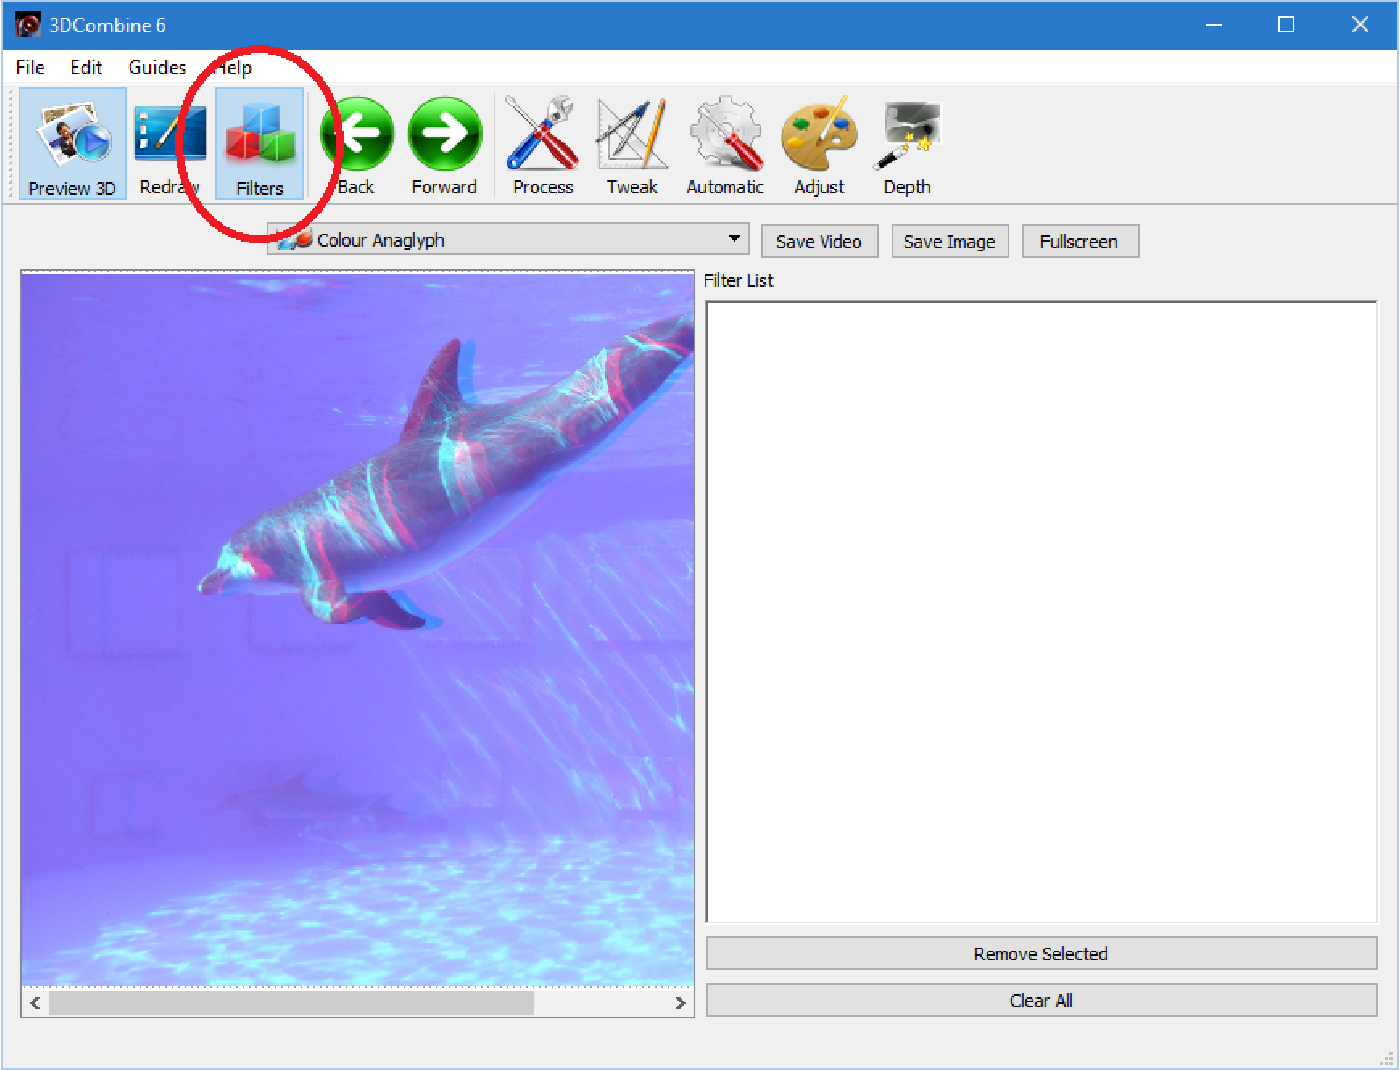
Filters are the mechanism for editing images in 3DCombine. One or more of them can be applied sequentially to an image to produce the desired effect. One a set of filter operations has been created in the Filter List, they can be automatically applied to the other images in Batch Mode.
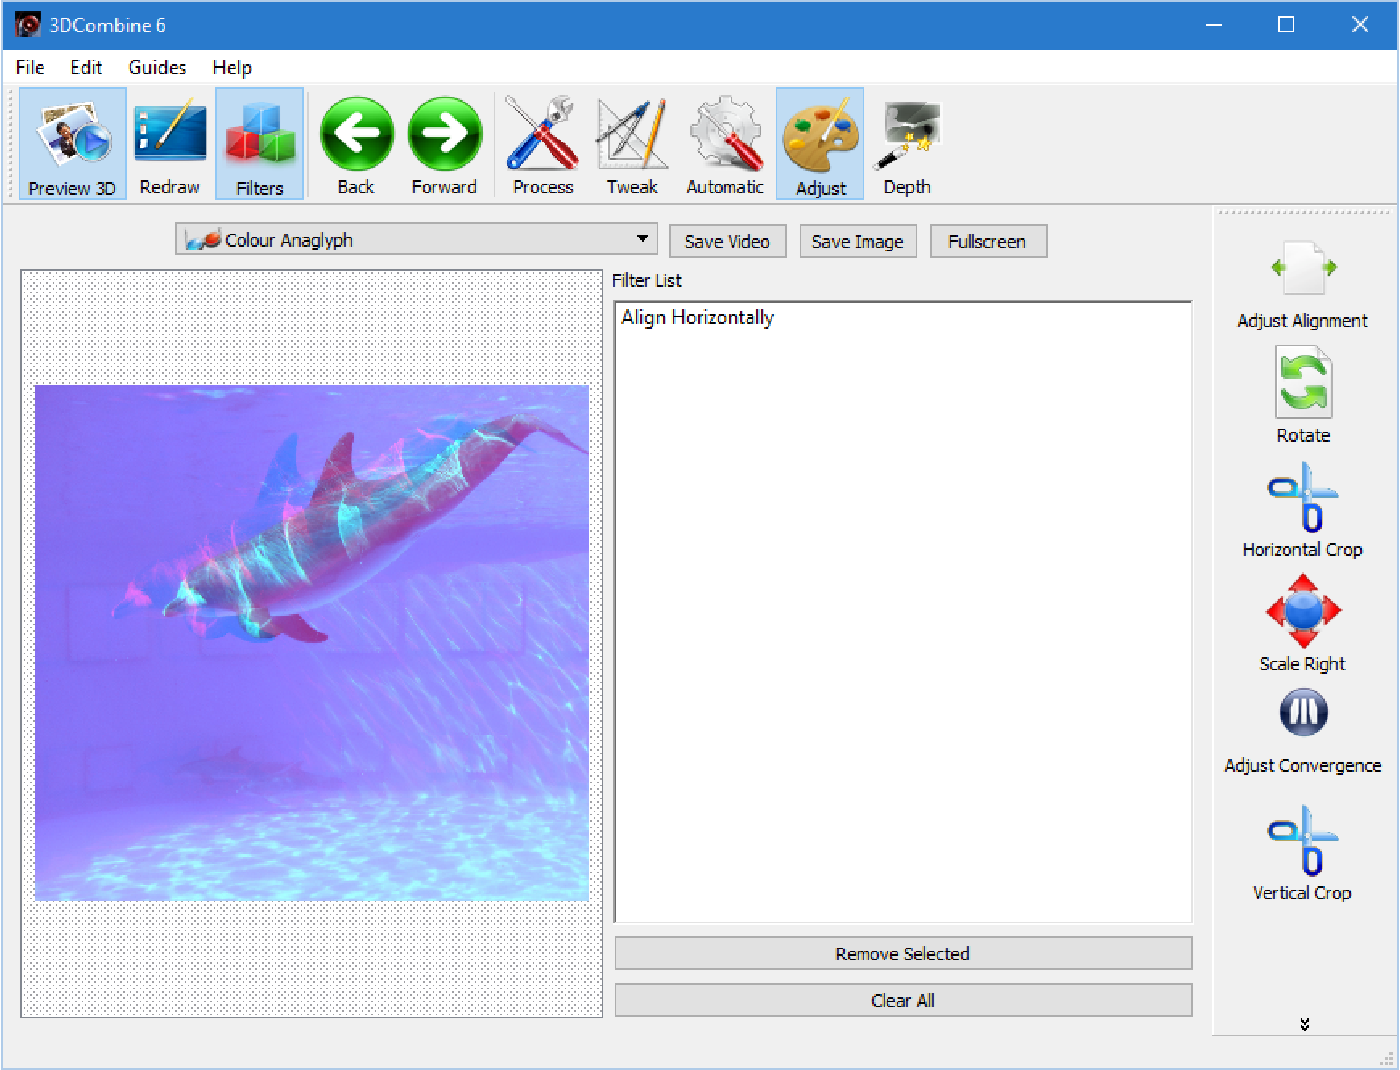
To see the current applied filters, select the 'Filters' button on the toolbar. This will make the Filter List window appear on the right hand side (as shown in the image).
It makes no difference to the processing whether the Filter List is displayed or not, but it is recommended to display it while learning to use the program.
The Filter List adds two new buttons:
Remove Selected will remove the selected filter from the list and Clear All will remove all filters from the list. Everytime the filter list is changed, the current image will be reloaded and the filters will run through in order.
Selecting Edit>Undo removes the most recent filter from the list.
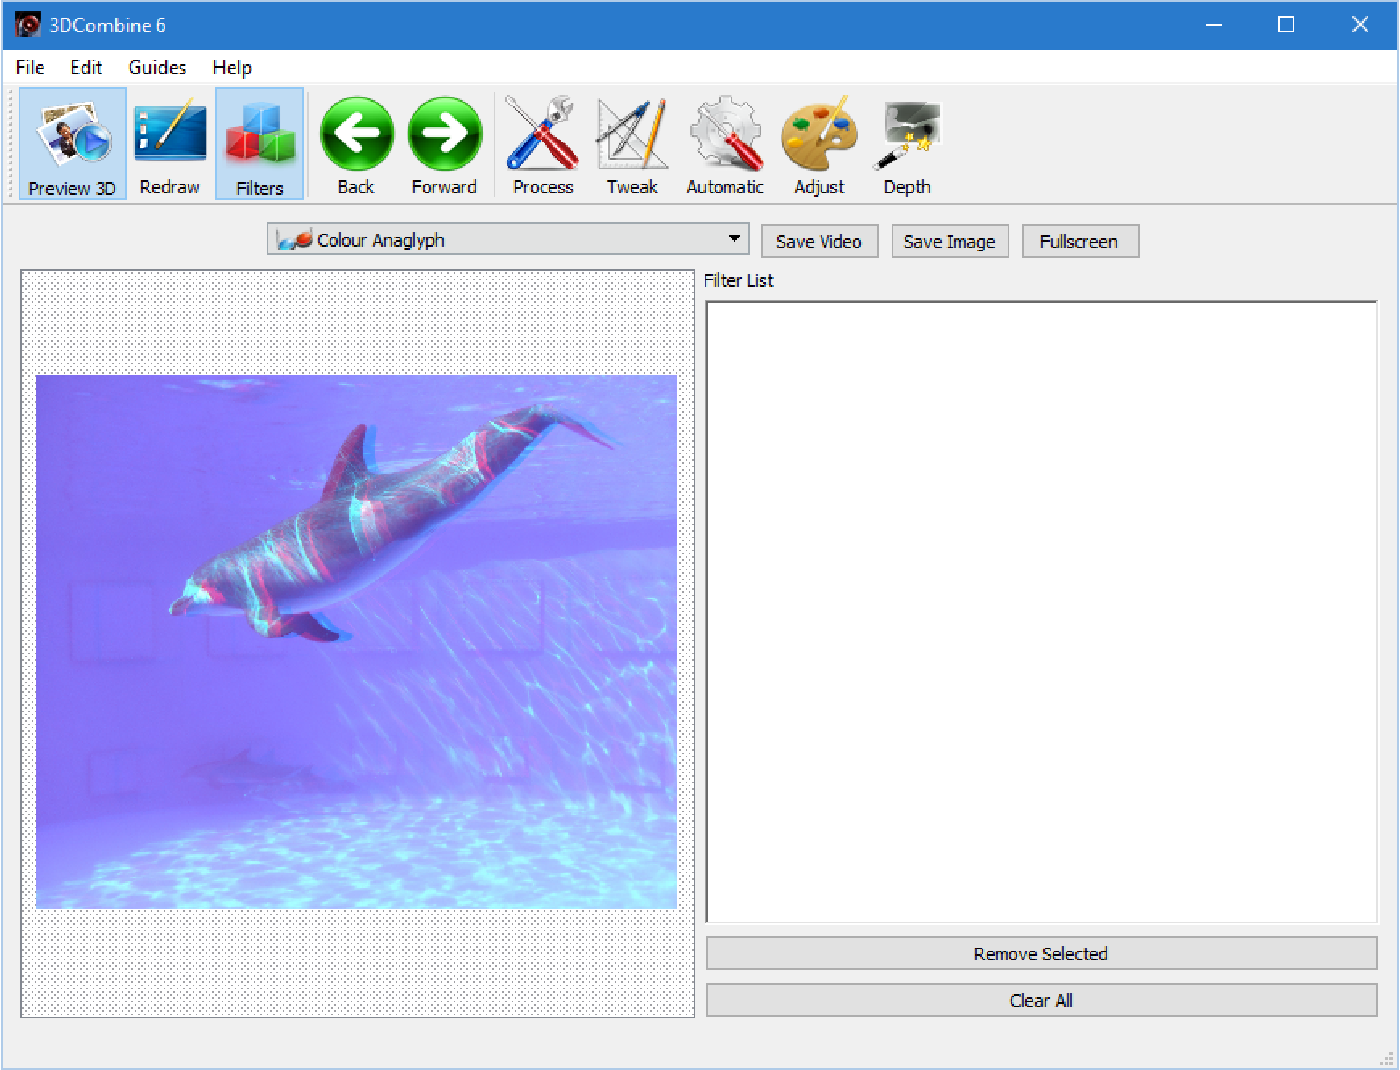
The redraw button resizes the currently displayed image to fit in the window. In the example above, the filters list reduced the available space for displaying the image and so scroll bars appeared. To remove those scroll bars, click redraw and the image will be resized to fit the available screen space without scrolling.
Note that redraw only effects the displayed image, it has no impact on the actual resolution of the image being processed or the saved file.
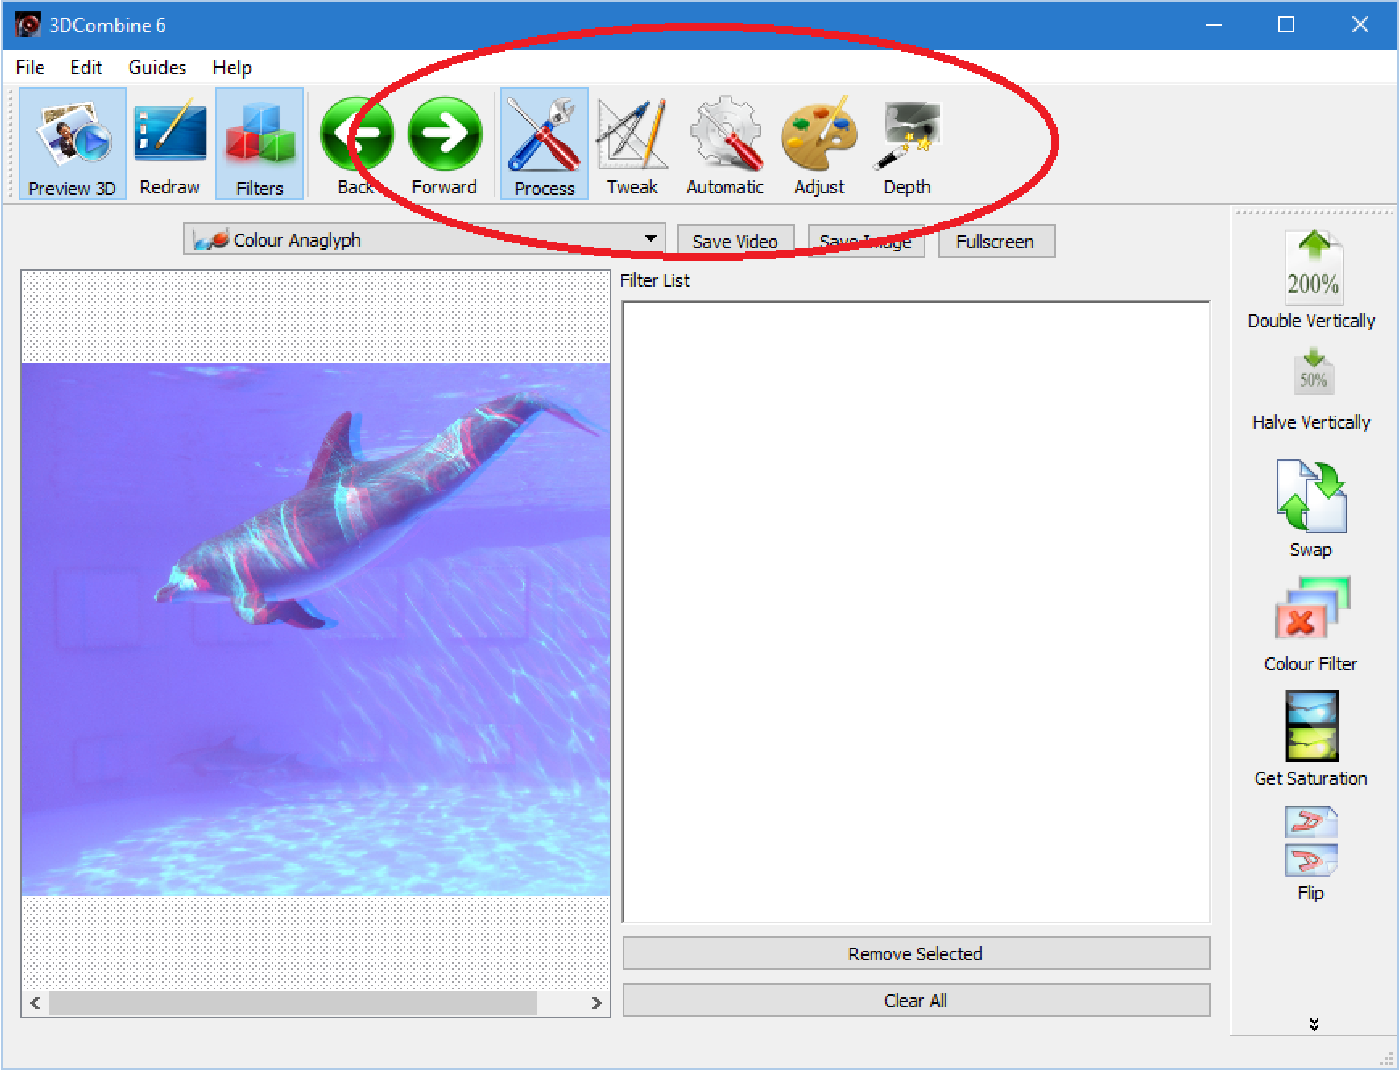
Filters are contained in toolbars which appear on the right hand side of the screen. There are five to chose from. The toolbars are selected by clicking the relevant button on the toolbar:
As an example of a common operation, a filter can be used to move the 3D image back into the screen. To do this, select the 'Adjust' toolbar and then 'Adjust Alignment'. Two sliders will appear at the bottom of the screen.
To temporarily increase the screen real estate, click the 'Filters' button to hide the filter list, then click 'Redraw'.
Hovering over each slider explains what it does in the status bar at the bottom. In this case, the left slider adjusts the stereoscopic image alignment horizontally. This has the effect of moving an image in and out of the screen.
If you have colour analgyph glasses, this effect can be seen in real time.
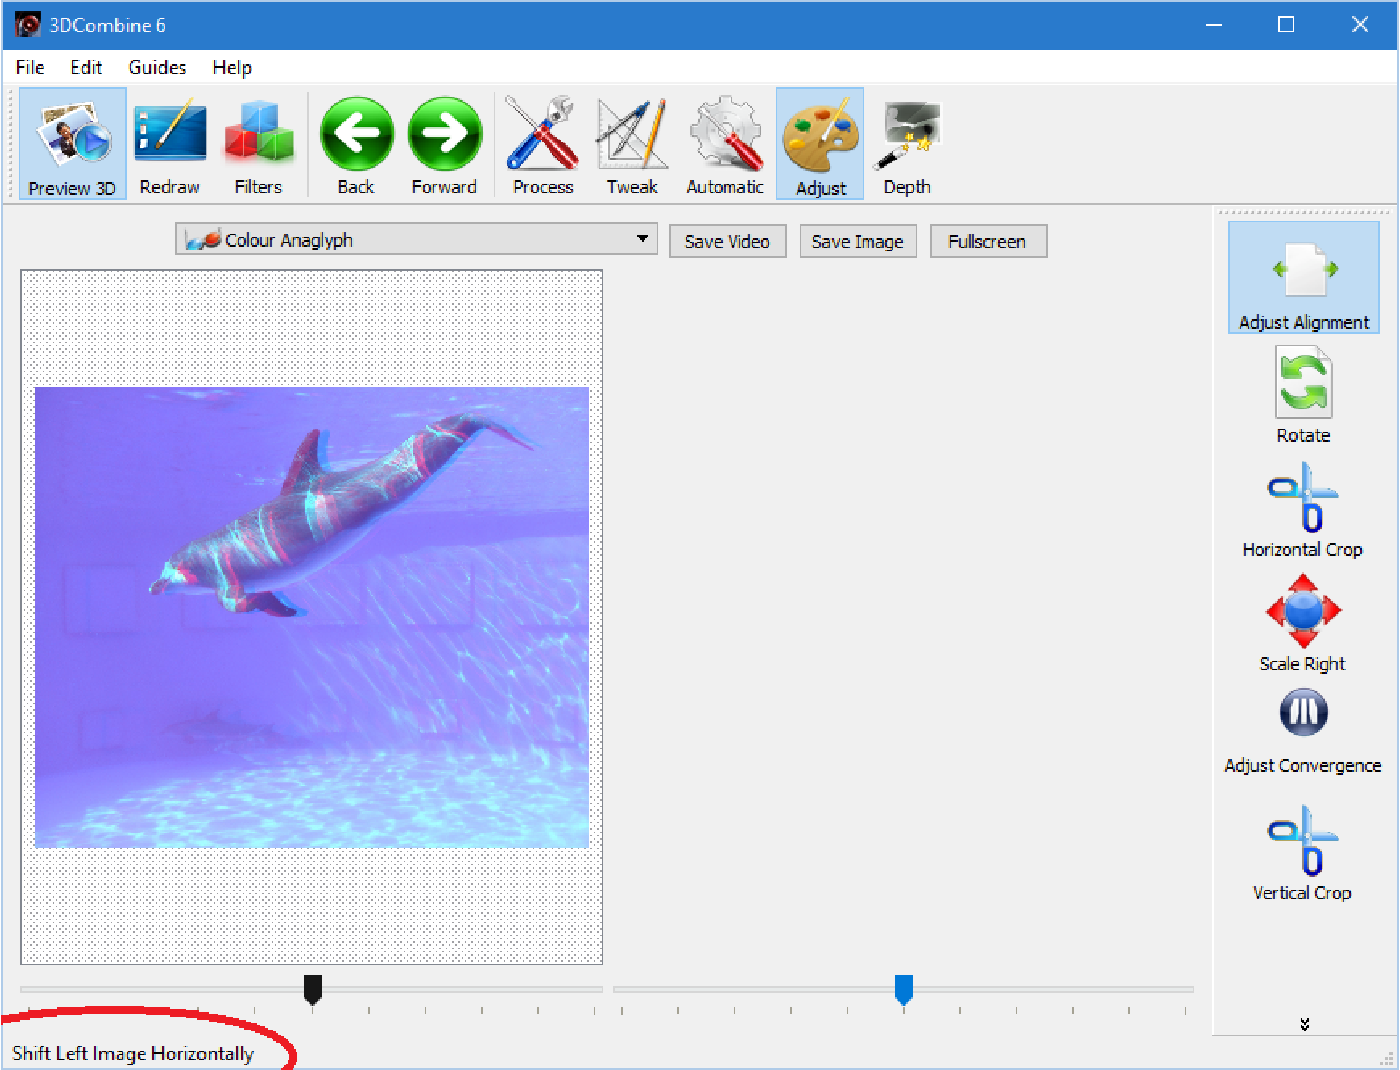
Move the bar one notch to the left and click 'Adjust Alignment' again. The software will prompt you to store the changes, say 'yes'.
Opening the filter list again, will show that 'Align Horizontally' has been added to the filter list.
Clicking on the Green arrows will allow the different batch images to be displayed. This filter will automatically be applied to each of them.
Any number of filters can be queued up sequentially in a single operation.
Now when the images are saved, each will have all the filters applied to it first allowing batch processing of the images.
FOLLOW US